

Why Landscape Solar Panels Can Be Better (But More Expensive)

Have you ever noticed that most solar panels installed on Australian roofs are mounted in portrait orientation?
Portrait is more popular because solar panels are cheaper and quicker to install this way.
This post will explain why panel orientation can matter, and why you may be better off with landscape panels despite the extra effort required to install them.
Note: This post is not about energy yield. In terms of energy yield, an unshaded portrait panel will generate the same as a landscape solar panel1.
Solar Panels: Portrait Vs. Landscape
Imagine you want to put 11 solar panels on a typical Colorbond roof.
You could install them portrait like this:
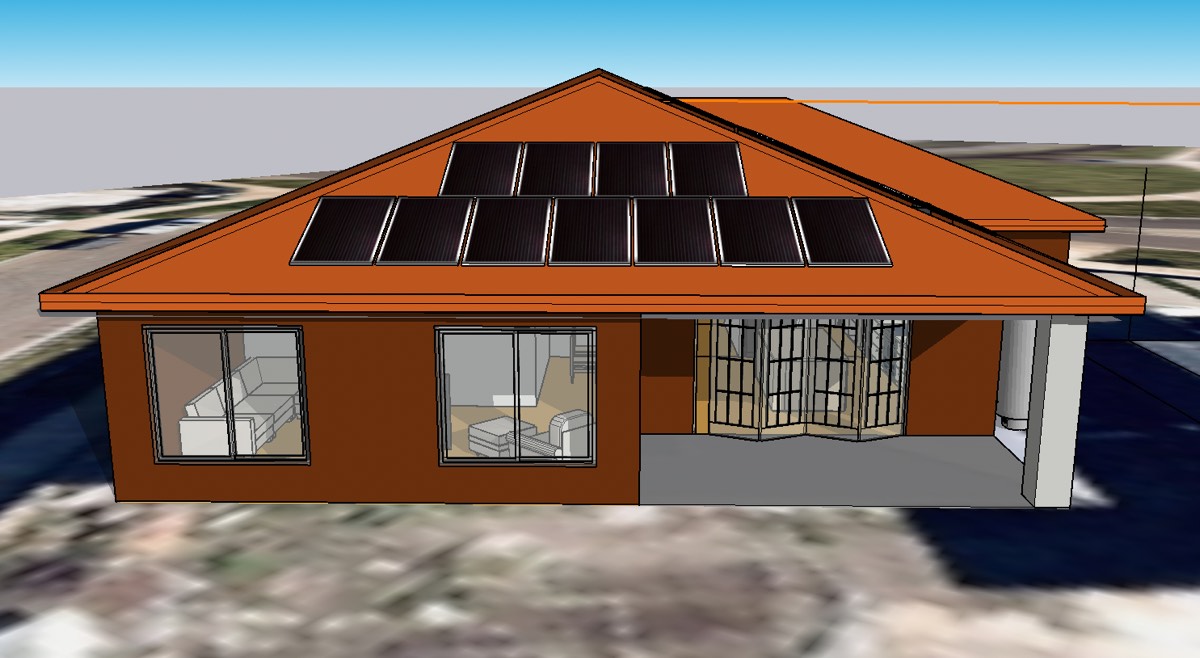
A simple portrait orientation solar installation
Or landscape:
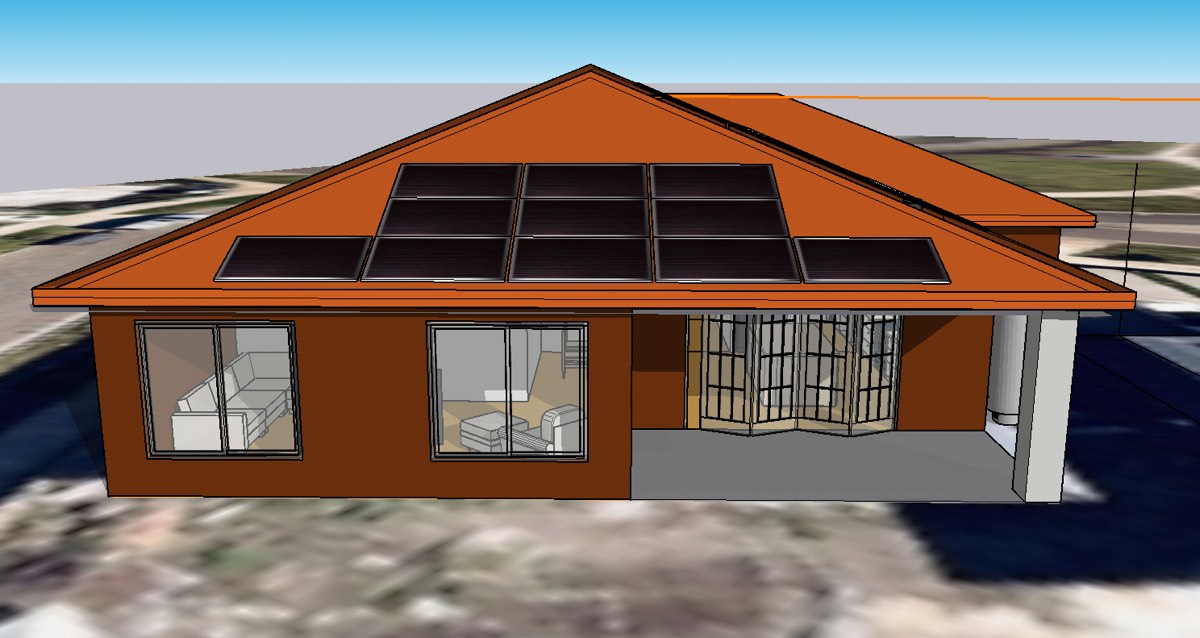
A simple landscape solar panel installation
Is one orientation better than the other?
For the roof in the two images above, almost all installers will choose to install in portrait orientation. That’s because it is cheaper and quicker to install this way. In fact, a landscape install can take 50% longer.
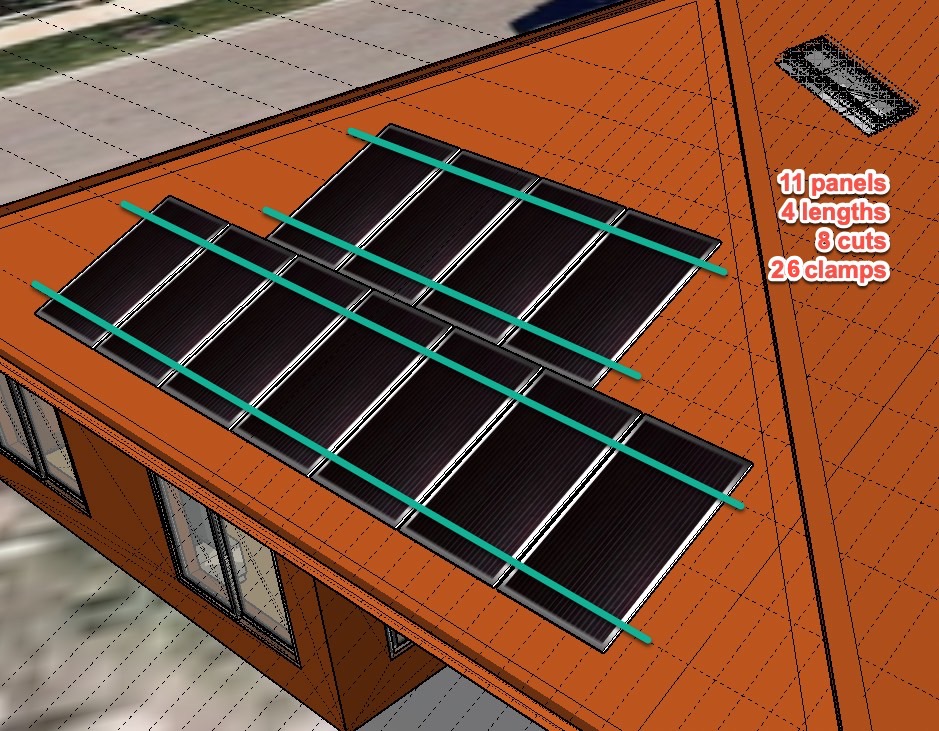
Here’s why. With a portrait install, the installer will need to cut and mount 4 lengths of rail, and use 26 clamps to mount the panels:
For landscape, the installer needs to use 10 lengths of rail and 32 panel-clamps2:
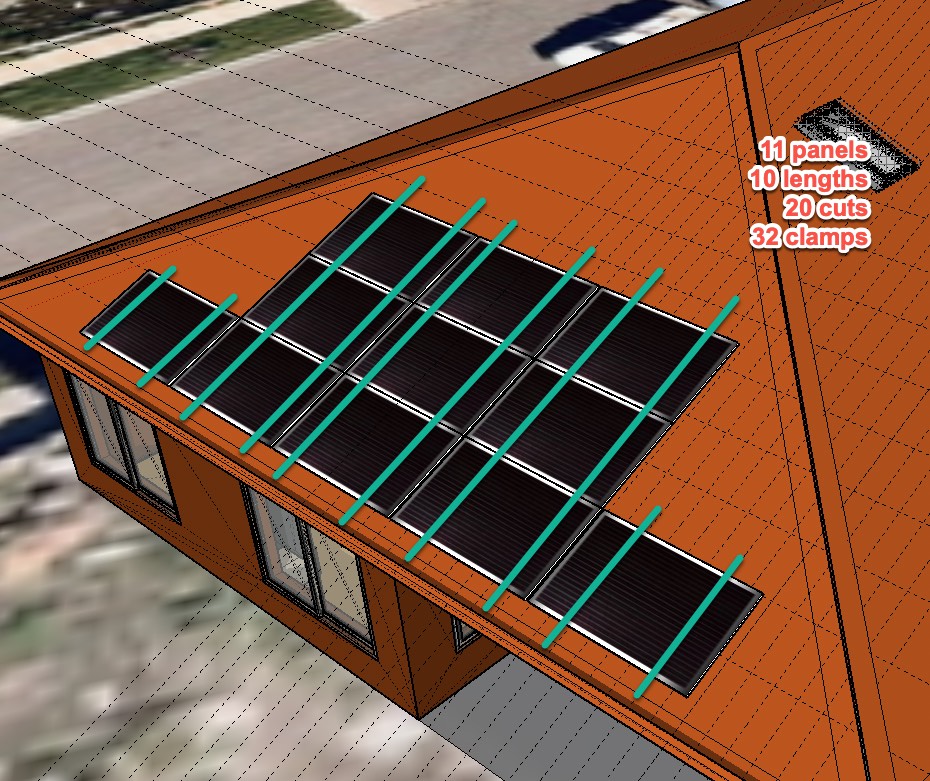
This image shows where the mounting rails would typically go on a landscape installation. On some roofs it may be possible to use 6 rails parallel with the long edge of the panels – but the roof’s screwline spacing and the clamping zones can make that difficult to achieve.
So, with the extra effort required for a landscape install, why choose landscape at all?
The answer is space efficiency. On many roofs, landscape will let you mount more solar panels in the same space while still respecting their clamping zones and the roof’s exclusion zones.
This means you can get more energy from the same roof.
Here’s an example using the same roof as before.
WIth portrait orientation and respecting a 200mm exclusion zone around the roof-edge, we can fit 12 panels.
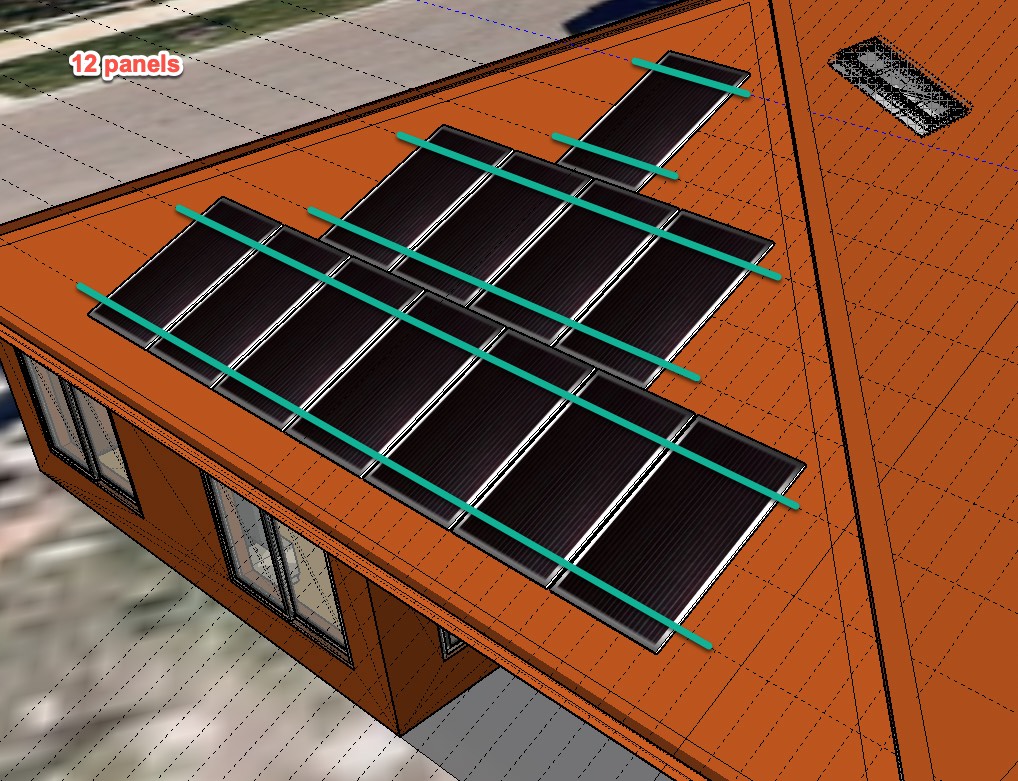
12 portrait panels will fit on this roof respecting exclusion and clamping zones..
WIth landscape orientation, we can fit 15.
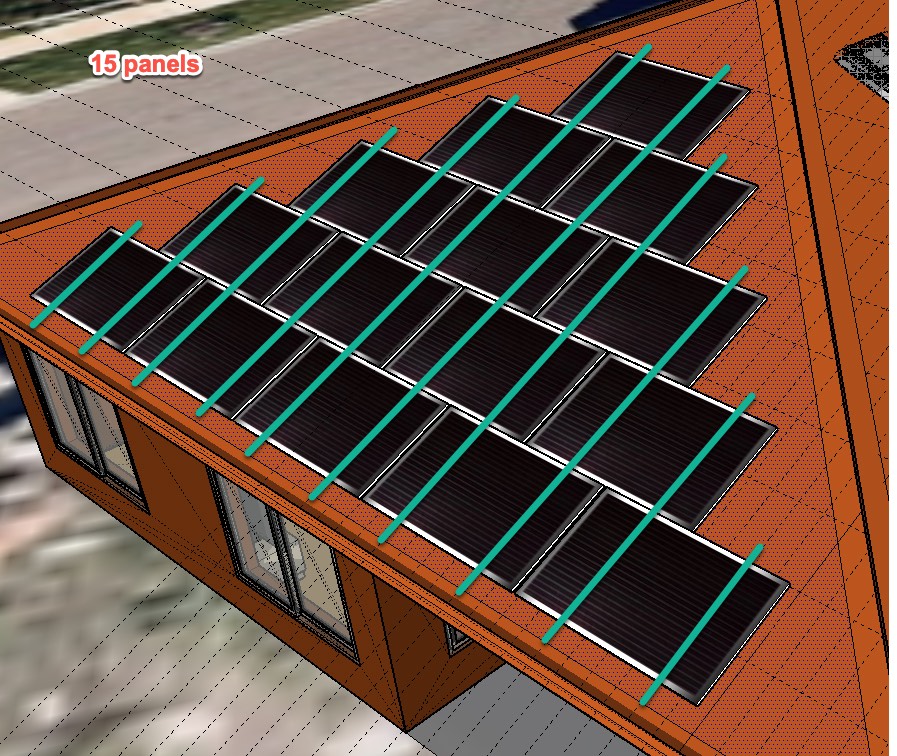
15 landscape panels will fit on this roof respecting exclusion and clamping zones.
Extra kilowatts from landscape can be substantial
Let’s now look at an example on a full roof with some complicated roof faces.
With a portrait install, we can fit 47 panels3:
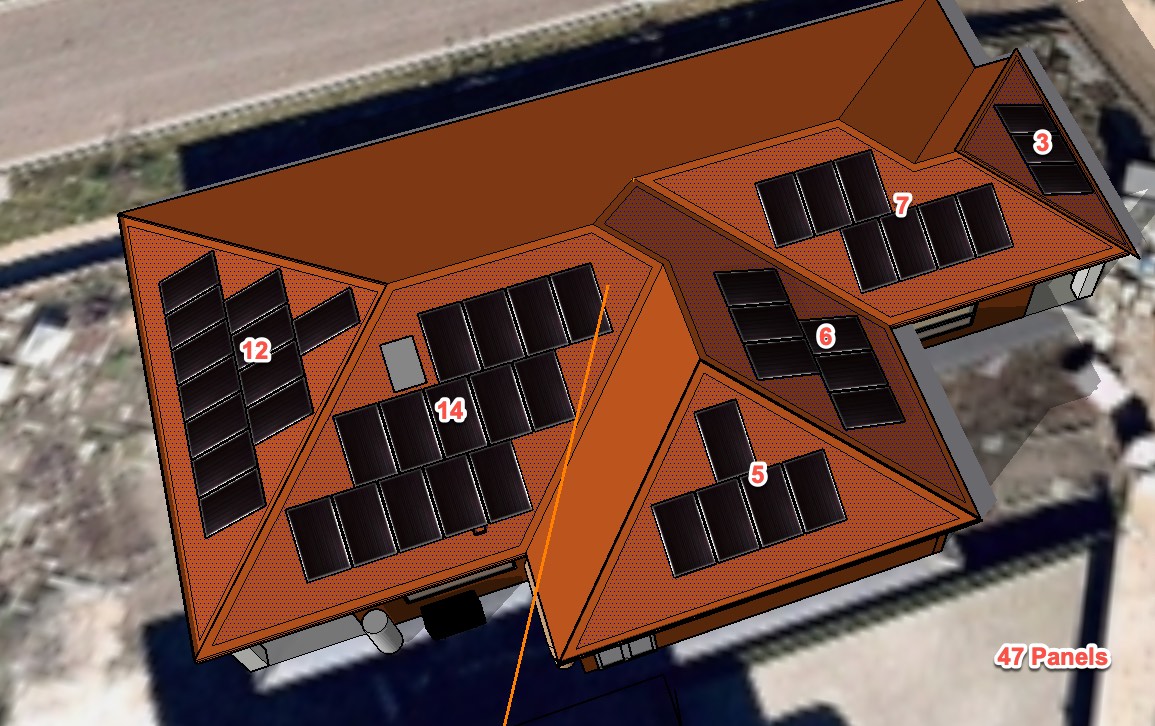
47 portrait panels fit on this house (excluding south roof)
With a landscape install, we can fit 57. If they are 400 watt solar panels, that’s an extra 4 kW on the roof.
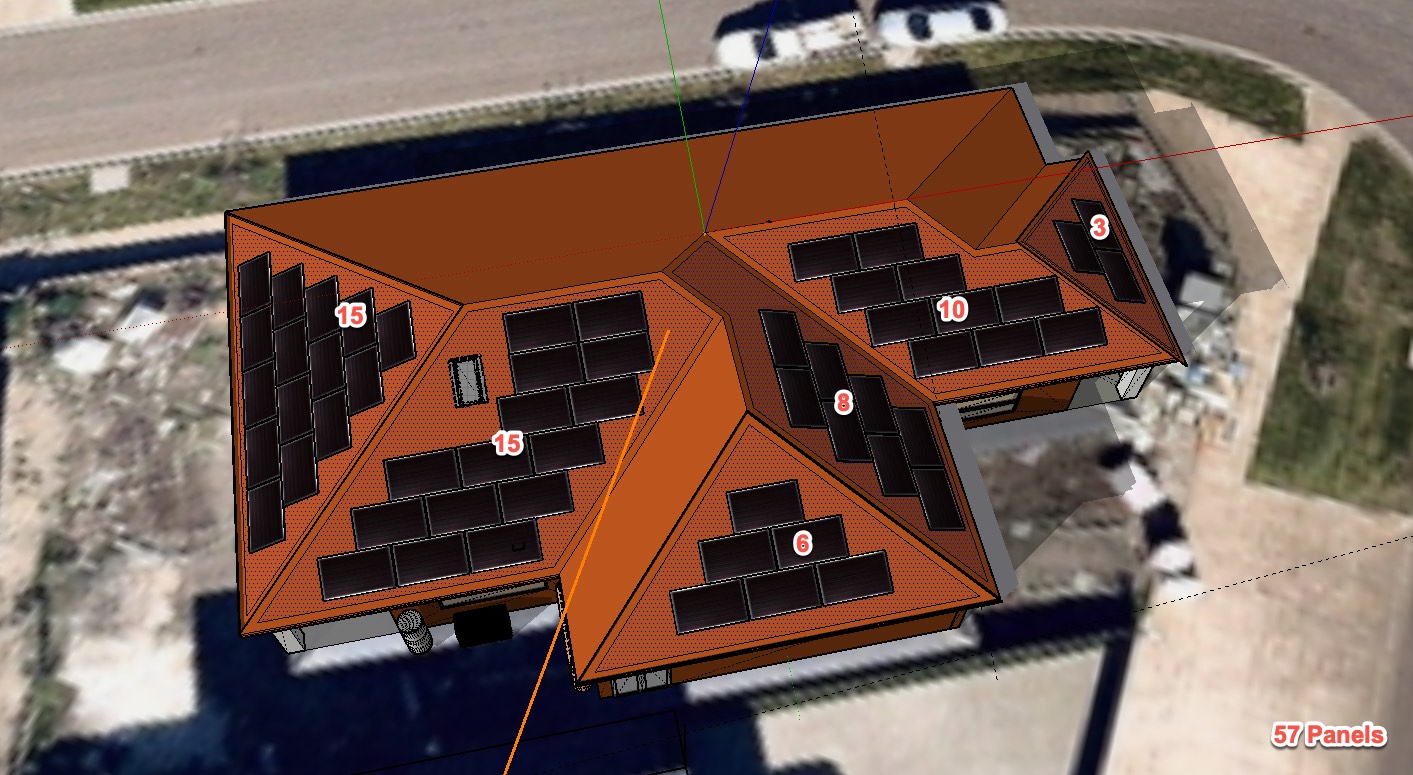
57 landscape panels fit on this house (excluding south roof)
Rushed installers won’t install landscape solar panels
One of the problems with getting the cheapest quote is the installers don’t have the time or the inclination to install in landscape orientation.
To fit all the solar panels you’ve been sold on to your roof they may have to:
- force them to fit in portrait, violating either the panel clamping zones or the roof exclusion zones, or both.
- tell you you can’t have all the panels you’ve been promised because they won’t fit.
Imagine you’ve been quoted 15 panels for the roof below. If the salesperson has only looked at your roof on Google Maps, it will look like they will easily fit in portrait.
But here’s what can happen when the installer has been told to install them and is in a hurry:
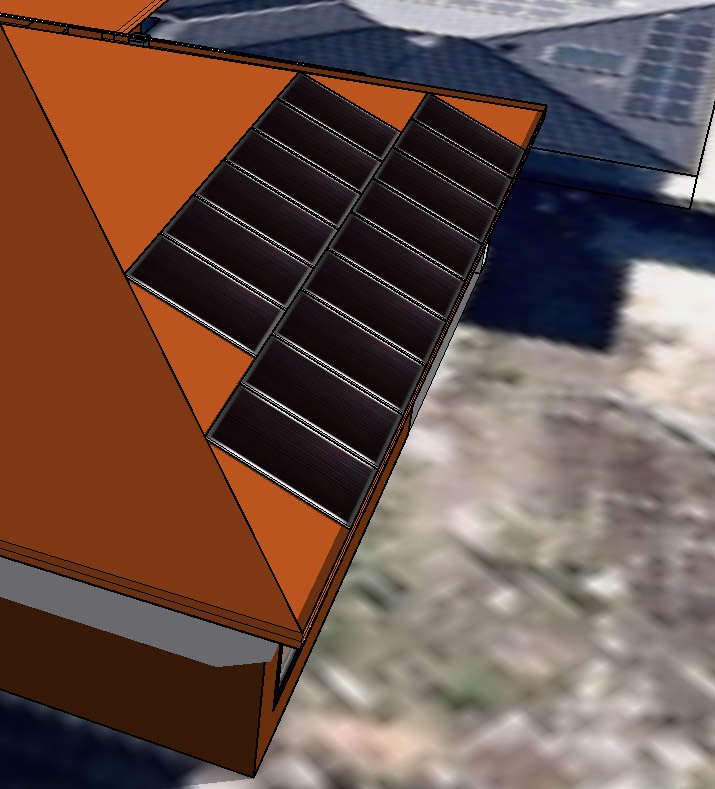
Exclusion zones violated! I see this all the time on rushed installs.
This is the quickest and cheapest way for a rushed installer to install those 15 panels. Unfortunately, to squeeze them in, the installer has violated the 200mm exclusion zone that is generally required to meet AS 5033, the Australian Standard for solar installations.
The install is non-compliant, looks shit, and when it rains the water that hits the solar panels will likely pour off the bottom row like a little waterfall, missing your gutter altogether.
Also – if the roof’s existing screw-lines are not in a convenient position relative to the panels, you may have panel clamps in the wrong place, relative to the panel’s short edge – voiding the solar panel manufacturer’s warranty.
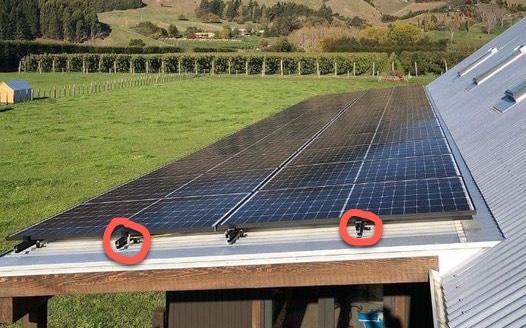
‘Diving board’ panel install. The circled clamps are too far away from the right hand edge of the panels. They are likely to flex in the wind, and the installer will have a hard job making a warranty claim with the manufacturer if they fail.
Be wary of salespeople who don’t consider landscape
Sometimes we’re asked for help by a consumer who has competing quotes outside of SolarQuotes where a salesperson is rubbishing their competition, claiming a competing quote has “more solar panels than will fit on your roof”.
Usually, this is because the accusing salesperson has not considered landscape orientation4.
All-electric future makes landscape solar panels more important
The future of residential energy in Australia is all-electric. In the near future, most homes will have electric heating, electric cooking, electric water heating, batteries, and an electric car or three. To power all that stuff, you’ll want to fill your roof with solar. Depending on your roof shape, this will often mean landscape solar is the best choice. Just don’t expect one of the big cheap retailers to offer it as an option.
Endnote: How to compare a landscape vs portrait solar panel layout in 2 minutes
I made the images in this post with SketchUp and the Skelion extension. If you have an accurate scale model of your home5, you can fit landscape or portrait solar panels on your roof in 2 minutes like this:
- Use the ‘offset’ tool to create a 200mm exclusion zone inside the roof edges.
- Select the roof areas.
- Hit the Skelion ‘add panels’ button
- Tell Skelion if you want portrait or landscape orientation.
- Done!
[embedded content]
Footnotes
- For some shade patterns, you will get more energy in a certain orientation because of the way the shade creeps up the panel, shading individual cell-strings ↩
- Also, the wiring can be trickier. ↩
- I’ve left the south-facing roof alone – but there is nothing wrong with installing south-facing panels in Australia ↩
- This is yet another problem with salespeople designing systems instead of qualified solar designers. ↩
- Most decent architects or project home builders will provide a Sketchup model these days. ↩
Original Source: https://www.solarquotes.com.au/blog/landscape-solar-panels/
Related Posts:
 Do I Need a New Roof to Go Solar?
- Solar Landscape starts first projects in 51-MW New…
- Solar Landscape will install community projects…
- AEROCOMPACT debuts racking for portrait and…
- Solar Landscape completes 20 MW of community solar…
- Solar Landscape begins 6.5-MW community solar…
- Solar Landscape completes 1.3-MW solar portfolio for…
- AEROCOMPACT develops solar racking for bifacial…


