
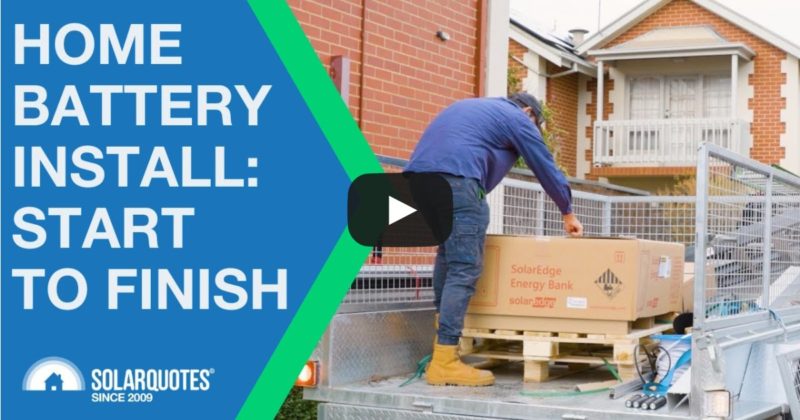
SolarEdge Home Battery Install – From Start To Finish


Watch one of Australia’s first SolarEdge Home Battery installations from go to whoa and discover what makes a top-notch solar battery install – including what sets installers apart when things go wrong.
— Transcript Begins
Introduction
(0:00) Finn Peacock, SolarQuotes Founder: Today we’re going to film the installation of a battery added to a solar system. We’re here in Adelaide, it’s June 2022 and we are back at the house where we filmed 6.6 kilowatts of solar getting installed about 18 months ago.
This is a SolarEdge solar system. It’s got a SolarEdge inverter, and SolarEdge have just brought out their brand new home battery. The homeowner decided, let’s pull the trigger, let’s install a battery. Today we’re going to film the installation of a battery added to a solar system. It’s a SolarEdge 9.7 kilowatt-hour, 5 kilowatt battery. That means it stores 9.7 kilowatt-hours of energy and it can charge and discharge at up to five kilowatts.
Today we’re going to see what needs to be done; we’re going to watch the installers install the battery to show you guys what a good battery installation looks like and what you can expect if you go ahead and add a battery to your solar system.
Inverter: Out With The (Not So) Old
(0:58) Finn: So, what have we got at the moment? Well, we’ve got a 5 kilowatt SolarEdge SE5000H inverter, which is connected to 6.6 kilowatts of solar panels on the roof.
Now, this inverter does not talk to the SolarEdge battery, so it’s going to be swapped for a brand new inverter called a SolarEdge Energy Hub inverter. And that’s a hybrid inverter that can talk to the battery and it works really well with it. And the good news is that SolarEdge, at the moment – long may it continue – will subsidise a new inverter. The homeowner is only paying a fraction of the price for the new inverter, so he’s getting a pretty good installation price.
Batteries And Brick Walls
(1:33) Finn: Now, the inverter is on a brick wall. That’s really good news for a battery because if you’re installing a battery, you’re not allowed to install them on combustible materials.
And the other two nice things about brick walls are they usually have a cavity behind them. If there’s a cavity, there’s always the possibility of putting the cables inside the cavity instead of running ducting or conduit on the surface. And that always looks better; if it’s possible – it’s not always possible. The installer will have a look, see what’s in the cavity, see if he can run the cables from the battery to the inverter in the cavity for a nice neat install.
The other nice thing about brick is it’s solid, so you can hang the battery on the wall instead of putting it on the floor. And again, that’s just aesthetics. You don’t need a floor stand, but it looks a lot nicer. So, we’re going to get a new inverter and underneath we’re going to get the brand new battery – all 121 kilograms of it.
Measuring Up, Cabling And Connection
(2:25) Reg, Installer – SEM Group: So, we’ve got 200 mm from inverters and we’ve got 600 mm minimum from windows, from inhabitable rooms such as living rooms, bedrooms; anywhere that they sort of deem where you can fall asleep or you can gather. They don’t deem as inhabitable bathrooms, toilets, laundries, that sort of area. And now we’re just going to look at starting to get the battery on and then we’ll get the inverter changed over.
Finn: Reg, I’ve just seen you put two bloody great big holes, one above the battery and one below the battery. What are they for?
Reg: This hole down here, down the bottom, is just we’re trying to eliminate any surface mount conduit. It takes our battery cable, our earth cable, and our data cable. The holes are obviously just to get into the cavity and to hide everything away. It just keeps everything nice and nice and tidy.
Finn: So, this is a DC-coupled battery. The power wires are going to be DC going from the battery to the inverter.
Reg: Yep. They connect straight in with the PV array.
Finn: And there are special rules about running DC?
Reg: There are – inside of buildings you’ve got to run them inside of HD.
Finn: And the reasons the standards say DC cable’s got to be in heavy duty conduit is safety.
Reg: Yep. Safety and segregation from AC. I mean obviously AC is alternating current, DC is direct current. Safety and your segregation from other services.
Finn: And you don’t want anyone putting a drill through a DC cable.
Reg: Absolutely not. Especially not under load. You know, a bit of a lightning bolt in front of you – that sort of scares the crap out of you.
With the SolarEdge battery, what makes it really desirable, especially for installers, is that with your standard DC; plugs straight into your inverter DC inputs as well. It’s a straightforward MC4 plug. It just makes it really easy for connection. There’s no real issues. It’s all really tucked away nice and neat and it just makes it for an easy job, an easy install. It’s a standard earth, nothing special, and just a standard data cable.
Built-in Battery Fire Extinguisher!
(4:15) Finn: A thing I really like about this SolarEdge battery is this device. And believe it or not, this is a fire extinguisher. So, how this works is, it goes into the top of the battery. It’s heat activated, there’s no electronics, it’s all mechanical. If it gets too hot, it will release potassium nitrate into the battery cells and hopefully that stops the combustion before it turns into a disaster.
Switchboard And Battery Backup Interface
(4:37) Finn: The old solar inverter has been replaced with the hybrid inverter. The battery’s been mounted, the cover’s on, all the wires are in. Now it’s time to go inside and do the switchboard and the backup interface.
When you get a battery installed, the installer’s going to have to do some work in your switchboard. He’s going to have to put breakers in and he’s going to have to rejig your mains.
Because the homeowner specified that he wants backup with his battery, we need to install what’s called the SolarEdge Backup Interface. That’s a nice little white box that’s going to look really nice, just mounted above the switchboard. When the grid goes down in this house, it’s just going to run fine with the battery backing up the whole house. The homeowner will get told by his app that he is in backup mode. He’ll know to be a bit careful with his energy usage so he doesn’t drain the energy, so he doesn’t go over five kilowatts of power.
So Reg, what are you doing to the switchboard?
Reg: As you can see, they’ve got an existing SolarEdge Energy Meter here at the minute. We’re going to remove that and we’re integrating that with the backup interface. So, in regards to rewiring switchboard, it’s actually quite straightforward. Rather than sort of multiple cables back and forth, we redirect the mains, it goes up into the interface. The interface is able to detect it, it brings it back and then is able to feed the loads.
Using that backup interface, it’s essentially sampling the grid. The minute that the grid drops out, it then goes, right, we need to change over. Changes over to the battery, battery kicks in and away you go. So, with the SolarEdge battery, it’s absolutely really quite straightforward.
Commissioning Steps
(6:23) Reg: What we’re doing at the minute is we’re actually doing a firmware update on the inverter, getting ready to be able to integrate the backup interface and the battery. Once we’ve done that and the firmware is updated, we’ll go through the commissioning process, re-pair the DC optimizers. So, from the old standard HD Wave to this new Energy Hub, refine them all.
We’ll then have to go through all over the monitoring again, reassociate this inverter with this customer’s monitoring portal. Go through the WiFi steps and then also go through the association process for the battery with the Energy Hub. And hopefully everything is all good.
Shit Happens, But A Happy Ending
(7:04) Finn: Commissioning of the battery took a few hours and that’s understandable because this is a brand new battery. In fact, this is the second SolarEdge battery ever installed in Adelaide and one of the first in Australia.
And the guys ran into a few issues. It transpired that the whole battery needed replacing. But, good on the installer, they got another battery within a few days and installed the new one; commissioned it and it’s all working hunky dory.
Testing The SolarEdge Home Battery
(7:41) Finn: We came back a few weeks later to see the finished installation and do some tests of our own. I’m going to do three quick tests just now.
First one, we’re going to see that the battery charges from surplus solar when there’s more solar than the house needs. At the moment the house is using less power than the solar is producing and all the surplus solar power should be going into the battery until the battery’s full up. So, let’s have a look and check it’s doing that through the SolarEdge app.
We’re currently generating 1.17 kilowatts of solar. The house is using 0.27 kilowatts of electricity. That leaves 0.9 kilowatts of solar to charge the battery, which is filling up nicely at 84% full. When the battery gets full, any more surplus solar will simply be exported to the grid, where the homeowner will earn a feed-in tariff.
The second test I’m going to do, again a simple one, but it’s kind of the opposite of the last situation. I’m going to switch on some appliances, so the house is using more power than the solar panels are producing. Then the battery should top that up so we are not pulling anything from the grid. And that is how you save money with a battery – by increasing your self-consumption. Let’s go and switch on the toaster and the kettle.
The toaster on – it’s about two kilowatts; kettle on, about another two kilowatts.
Okay, the toaster and the kettle are on; so let’s check that – although we haven’t got enough solar power, we’re still not drawing anything from the grid cause we’re getting lots of battery power.
The house is using 4.38 kilowatts, but the solar is only generating 1.81 kilowatts. That means we need about two and a half kilowatts from the battery. You’ll also see there’s 0.06 of a kilowatt coming in from the grid. Now that’s only 60 watts. And the reason for that is that the battery control system is not perfect. But at 60 watts it’s really not going to have a meaningful impact on the bill. So, I’m happy with that.
Now for the exciting test – and that is backup. Not all batteries come with full house backup, but this one does because it’s a good one and the homeowner paid for it. I’m going to flick the main switch, which physically disconnects the house from the grid. There’ll literally be an air gap and then we’re going to check that the lights stay on. What you should see is that with this battery, there’ll be about a three second gap between me flicking the switch and the lights coming on. But fingers crossed they will come on. So, let’s try that.
Ready? 1, 2, 3.
And we are back. That was exactly a three second gap. Some batteries, they’ll do it instantly, but this one for whatever reason doesn’t.
Finn’s Final Thoughts
(10:12) Finn: So, we’ve done the three tests. The battery’s working great. That was an example of a really good battery installation despite a few problems, which I think we can excuse because it’s the second SolarEdge battery in Adelaide.
But what it does show is the importance of a good installer. This installer, when the system wasn’t working, which wasn’t his fault, he went out of his way to get the homeowner up and running as quickly as possible.
Let’s just recap why – despite some of the commissioning problems – this has turned out to be a really high quality battery installation.
As you can see, the switchboard work and the backup box has been integrated as well as you can. It all looks neat. The cables are as hidden as they can be.
Let’s go outside and have a look at the money shot, which is the inverter and the battery on the wall.
And here we are outside at the second battery. You can see we haven’t got surface conduits snaking all over the place. The installer’s done everything you can to keep it neat and go through the cavity. So, battery’s on the wall, AC isolator, and inverter. This is the only conduit you’re going to see and it just looks really neat. Ready to do at least 10 years’ service, hopefully closer to 20.
And now this householder can look forward to three things. He can look forward to lower bills, he can look forward to not really worrying too much about what happens to power prices because he’s going to be importing almost nothing from the grid. And finally, if there’s a blackout, he can have the smug satisfaction of being the only house in the street with the lights on.
— Transcript Ends
The solar power system associated with this SolarEdge Home Battery is also an example of gold-standard installation practices, which we covered from start to finish in an earlier video. Both the solar and the battery system were supplied and installed by SEM Group.
So, what does the owner think about his shiny new battery and his experience to date? Read his SolarEdge Home Battery review here.
Thinking home battery storage? Check out Finn’s comprehensive guides:
If you’re ready to buy a solar power system and/or home battery; get quotes from quality installers Finn has personally pre-vetted and trusts.
For a bunch more videos on everything solar, check out and subscribe to the SolarQuotes Youtube channel!
Original Source: https://www.solarquotes.com.au/blog/solaredge-battery-installation-mb2656/
Related Posts:
 SolarEdge releases DC-optimized home solar, storage…
- SolarEdge announces its residential battery is now…
- Tom’s Solar, Battery And EV Tech Struggle – Can You Help?
- EV Powers House: Australia’s V2G Bidirectional…
- Buying Home Batteries In 2023: Everything You Need To Know
- SolarEdge Struggles In Q1 2024
- SolarEdge Home Battery joins Rocky Mountain Power…
- SolarEdge opens 2-GWh battery cell manufacturing…


