

Installing Solar On A Tiled Roof? Why You Need Spare Roof Tiles


As a qualified builder and roofer, I should disclose that I really don’t like tile roofs.
They’re heavy, they’re porous and get heavier as they soak up water, they leak heat and dirt, they’re hard to install on, and sadly, as many people find out, water leaks lead to recriminations. But we have to deal with them, and rest assured there are good ways to do it. Read on for a guide to the finer details of installing solar panels on a tiled roof.
The Best Tile Roof I Ever Worked On
That was one we filled a skip with. I was on-site to move a solar hot water service while the roofers went about their work. 16 tons of broken masonry was thrown unceremoniously off the roof into the bin, and replaced with 1.2 tons of iron roof, plus extra insulation. Without the extra weight, the gutters could be fixed, and the eaves wouldn’t sag.
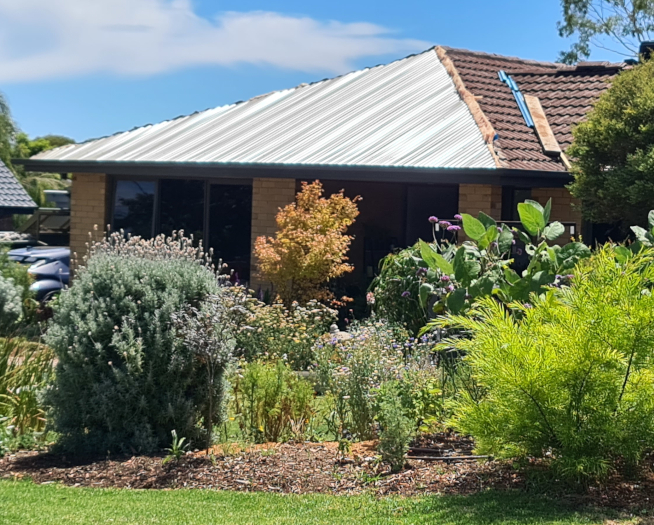
A work in progress. Shiny new roof, light in colour with fluffy insulation evident. This should be on this list for any significant renovation.
If You Want To Be Sure – Get A Site Visit
The prospect of a tiled roof is a great reason for a solar installer to do a site visit and positively identify what kind of tile you have. Why do they care? Mainly because you need to have spare tiles on hand before starting installation, but also because some profiles, like Spanish deep or super flat terracotta shingle may need extra extension brackets or even a completely different fixing such as a “hangar bolt”, which is drilled through instead of laying between tiles.
Sooky installers will go ashen-faced and shuffle away backwards if you have thin tiles or a slate roof. The gun tradesman will install hangar bolts and get on with it.
If you don’t have spares left over from the original build, the installer should be able to point you in the direction of a local salvage yard or tile supplier, because they’ve been to them before. They may be glazed terracotta (known in the solar industry as TERRORcotta) or concrete tiles, but either way there are some that are quite robust and many that are horribly brittle.
I have had first-hand experience with tiles that seem quite good. They handle foot traffic quite well during the framing and wiring stage of installation but as soon as we start marching the solar panels out, an extra 20kg per footfall breaks them at an alarming rate.
So, please make sure you have spare tiles available on install day.
What Did Tiles Ever Do To You, Anthony?
My most unbelievable job was terracotta on a two-storey house with a coastal outlook. Bear in mind it had a steep driveway and required we sling panels and lift them two at a time with a crane truck. Close to the limit at 9 metres reach and using a spotter to operate the crane just made it more fun.
Walking off the ladder at the back of the property was ok but the real killer was that as soon as you crossed the ridge to the side that cops the prevailing wind, the tiles were little better than chalk.
Many of these crumbly old bits of rubbish have been protected from the elements under a solar panel array for 9 years. The rest of the roof looked cleaner because the rain strike of individual droplets washes away the evidence of disintegration. Under the panels the fragments just sit on the high points. credit Solar Depot
Many people don’t realise clay tiles aren’t necessarily as well protected on the underside, and so they fret and disintegrate from the inside out. We used all the spares the customer had. The best approach for the work crew is to notice, examine and mark the tiles as they’re broken through the day. Once the job is finished you work back across the roof swapping them out.
If your spares are a different colour then they can be put under the solar panel array before the panels are laid, but otherwise I try to do them all at the end of the day. As for our horribly brittle coastal tile house, as I was trying to get off the roof for the last time I of course broke another tile.
I scurried across to swap the cracked tile with one that was under a lead flashing against a wall. That trick had been done before, so I had to choose carefully to find one that was intact (air conditioners and chimneys also often have good tiles hiding under flashings). The most comical part was that this process had to be repeated four times before I made it off the roof without the telltale crack of a tile failing underfoot. It was a long day.
Modifying Tiles The Right Way
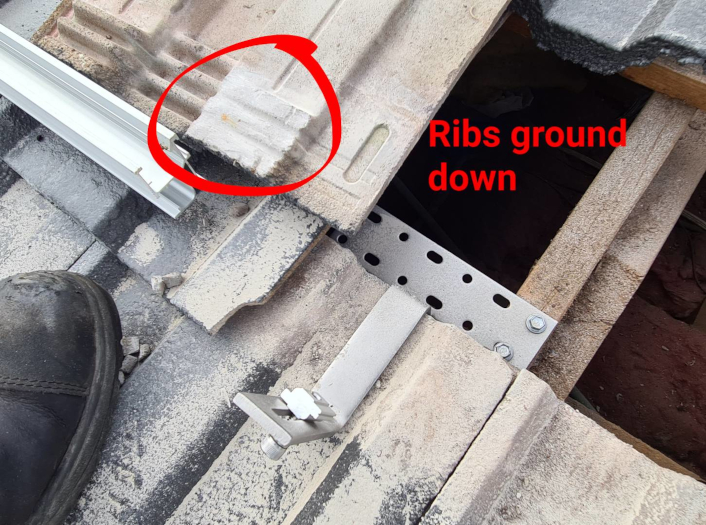
The other thing often breaking tiles is rough workers using rough methods to create the clearance needed for tile brackets. For some profiles there is a pretty straightforward way to chip a piece of tile away with a hammer. It’s quick to do of course and not too far removed from the way tiles are “cut” to fit hips and valleys when they’re installed.
This was a relatively simple modification on a concrete tile. Credit: Me.
A better class of solar installer will use a grinder with a diamond wheel to make the required channel. It might mean both the top and bottom tile is ground out or has a lip cut off, but in any case, the workers involved should have a decent-quality respirator on. Dust diseases aren’t pretty.
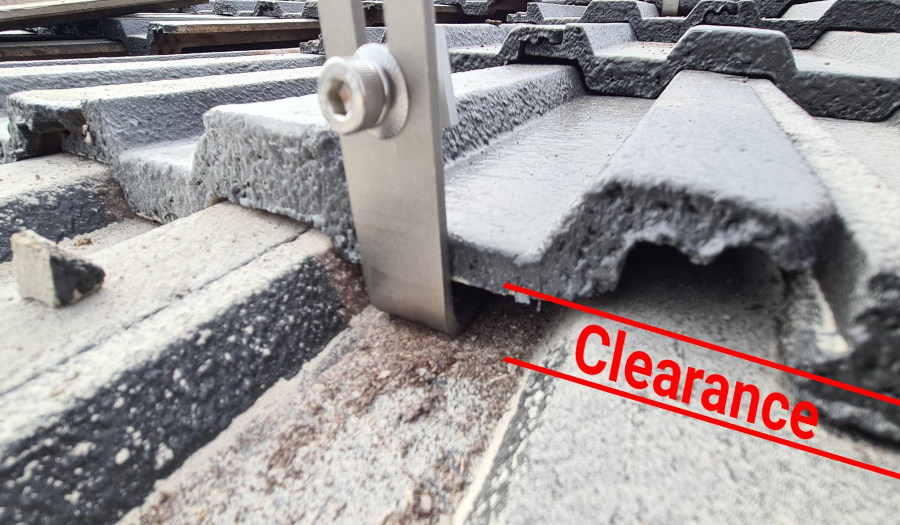
This is the desired fit. The aim is to have the tile sit nicely back where it should be, even though you have a stainless steel bracket laid between them. I know there are hundreds of jobs in the wild where nothing has been ground, and they seem to have gotten away with it unless it’s a low pitch. But a low-pitch tile roof is an especially silly idea in the first place.
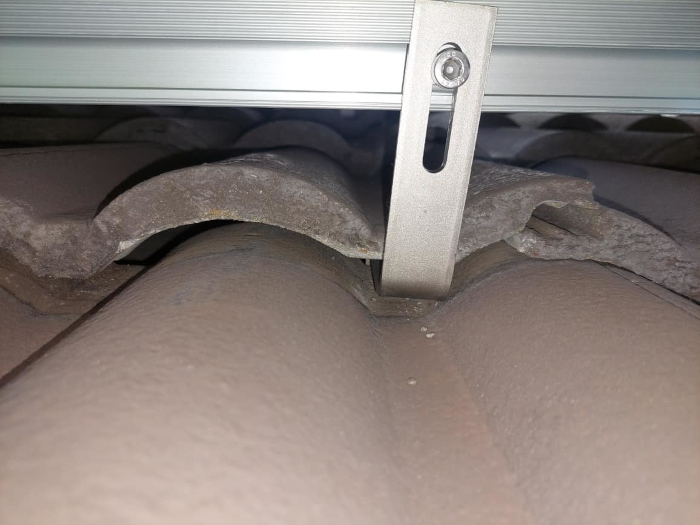
This is how it shouldn’t be done, yet it often doesn’t prove to be a problem.
Other Points To Consider
Terracotta tiles are kiln-fired and often aren’t consistent in size and shape, so they don’t always engage with the tile battens or each other very well. In contrast, solar panels are millimetre-perfect and will often show up sagging roofs, deviations in battens and other “organic” flaws tiles usually hide.
Hardwood battens can spilt and move – as can rafters supporting them, which your solar frame is screwed to. So, a roof restorer who is looking for cracked tiles and otherwise focusing on repointing hips and ridges may not notice more general issues with the tile placement on the battens, and everything being perfectly straight and true.
These are issues solar installers find frustrating – tiles don’t appear higgledy-piggledy until you put a straight edge across them and show up the flaws. Then everyone is a bit miffed at the appearance.
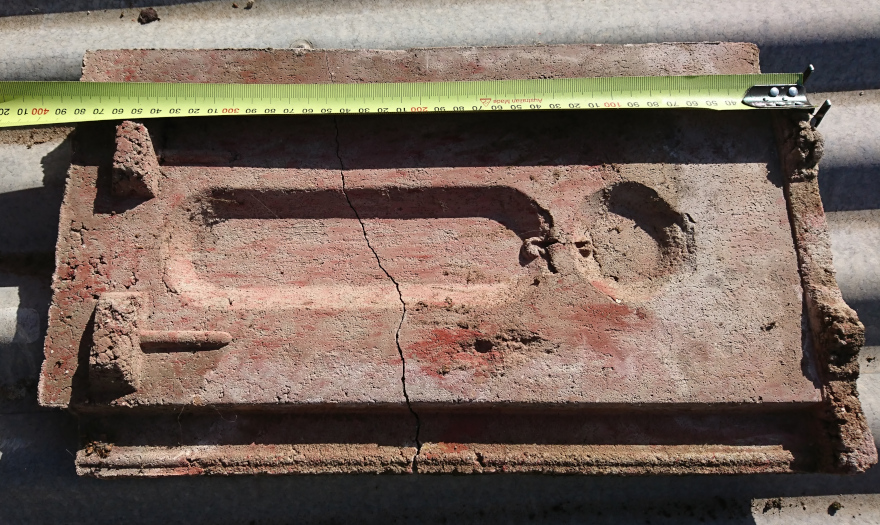
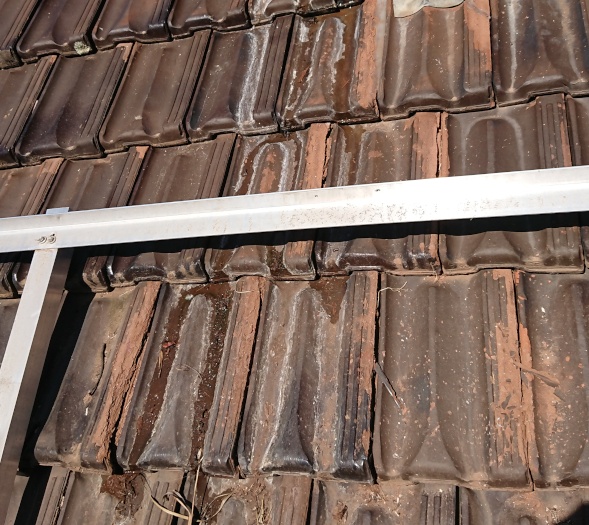
Clean break across the middle but you’d be surprised what roof sealant will do while you’re chasing far and wide for very old tiles.
The Riskiest Tiles
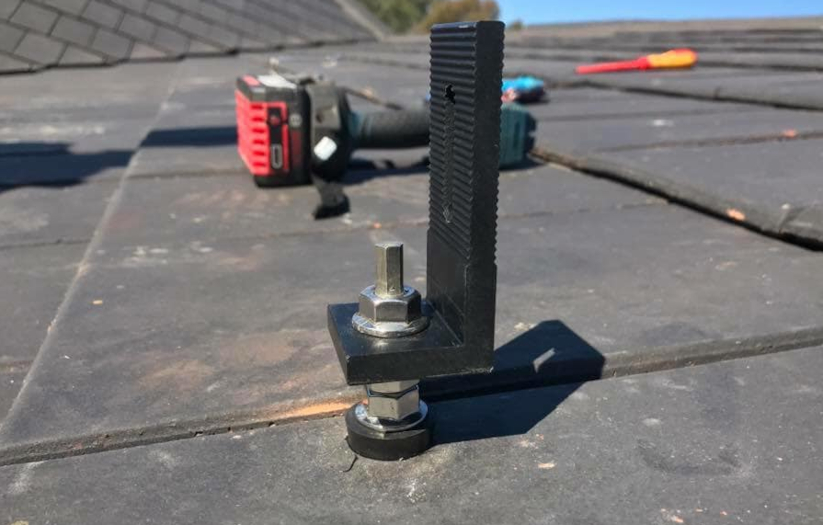
When installing tile brackets for solar framing, they often must be shimmed/packed up to clear the tile they sit over, while the tile that covers the bracket must be ground out to allow the tile to sit down in place over the bracket. Disturbing them in this process might mean you find they or the battens have been fretting and crawling.
The risk for solar installers is that the tile under the bracket can be cracked if somebody rests too much body weight or steps on the racking.
Cracked tiles can leak and are very hard to replace in this situation without totally disassembling the array. Depending on the amount of work involved and the extra foot traffic required, these leaks are sometimes best fixed not by tearing it all up, but simply by using the best quality polyurethane sealant (i.e. Sikaflex). I have worked on tile roofs without spare tiles and the broken ones end up glued back together, often quite successfully. They’re put at the bottom of the roof where they can be replaced later.
Needs must. Half a tube of Sikaflex and a modified metal isolator cover later…
Getting Wiring Through Tiles
Making a penetration in a tile roof can be managed in a few ways, and despite what you might think about the mechanical mounting of arrays, getting the wiring through can’t be done the same way.
AS/NZS 3000 prohibits running wiring within 50mm of a finished surface, not that it stopped many installers for many years. However, the rules state wiring must pass through the roof at right angles to it.
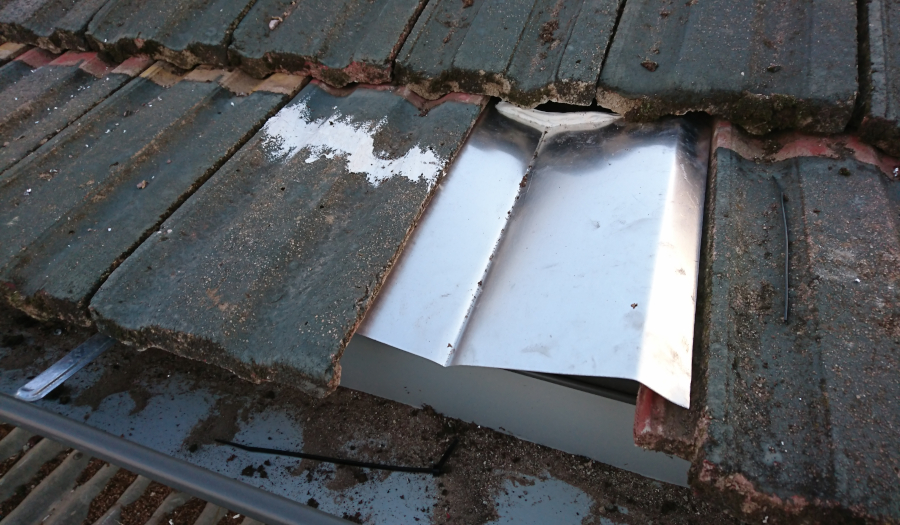
Full-sized flashing can be used over a cracked tile if running short.
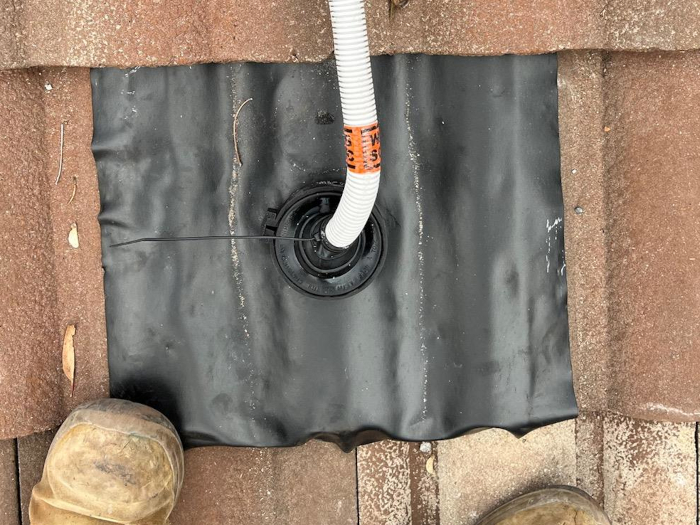
Many installers will use a large EPDM flashing that covers or replaces an entire tile, and they’ll swear at anyone who dares try it another way.
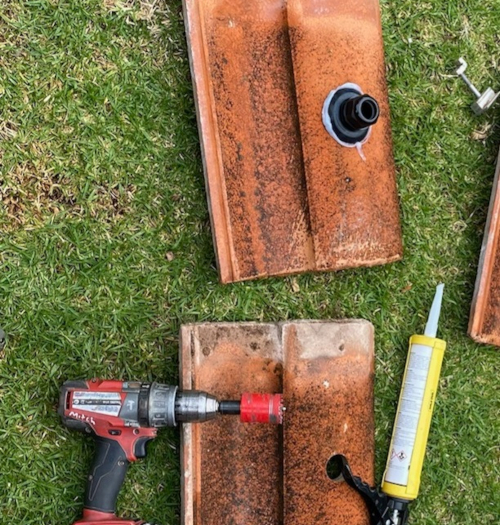
My personal approach is to use a wet diamond holesaw to cut a neat hole, clean the tile and then glue a Dektite to the tile with polyurethane sealant like Sikaflex. This is the same style of stuff they use to make the windscreen a structural part of your car. Even roof and gutter silicone will work if it’s applied properly.
Red silicone flashings would be my preference but at least we got to use sikaflex here to bond this EPDM one down. Note the tile overlaps the edge to help make it mechanically waterproof and hold it down while the sealant goes off.
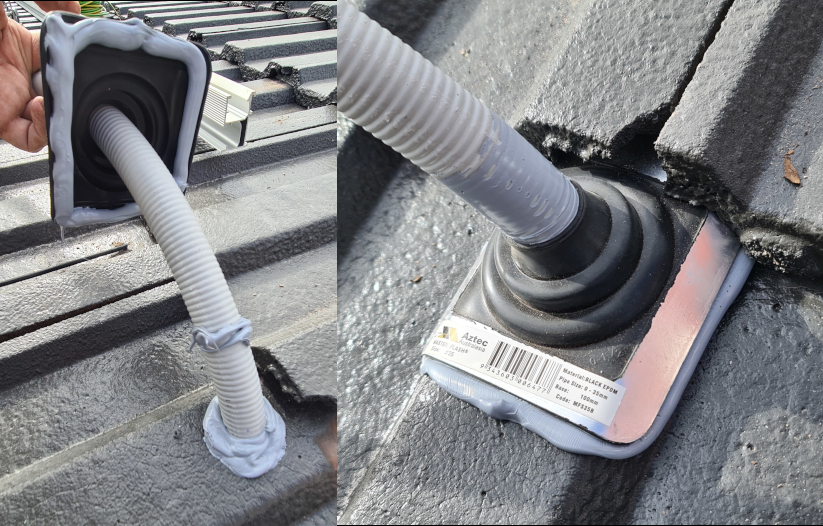
I’ve also seen a metal flashing used instead of a tile or, perhaps the best yet: a threaded bulkhead fitting. You must drill a neat hole. Once the hole is made, the gland fitting is installed and a nut wound on to secure it. This solution is mechanically strong and very well sealed, I would specify these cobalt ones if you’re after the best.
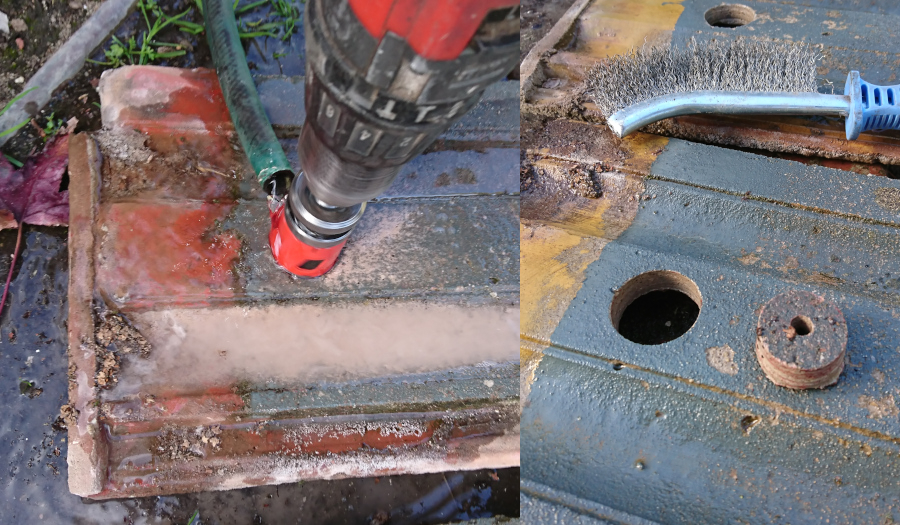
I find it’s best done wet. Dust control, tool life and, importantly, tile cleaning for good adhesion is important.
Cobalt gland – which is a bulkhead style fitting for really durable penetrations.
Other Issues With Solar On A Tiled Roof
The final thing I should mention about tile roofs is they sometimes preclude you from having solar panels unless you’re willing to have the ridges and hips relaid. The real pain with tiles is the cappings are bedded with sand and cement, then pointed with yet more inflexible cement render. Modern formulations are much better, but the point remains, you can’t get a bracket near the edges of the roof plane, and so it makes the roof smaller in solar terms.
If you’re planning on having the roof restored, it can be beneficial to have the work staged so cleaning and painting are done before the solar installation (including some spare tiles), and the ridges and hips are repointed afterwards so that work isn’t disturbed by solar installers kicking tiles. I’ve seen it done both ways, and if you raise it with your installer, they’ll at least know you have the best outcome in mind.
The most frugal tile owner I ever met made himself a tiny crane, winched his tiles off the roof four at a time, and hand-painted them on the ground before swapping them back onto the house. I think he could get a couple of dozen of them done in a weekend if the mood struck him.
Be Aware Of Roof Painters
Some of these people are not very bright. They will lay tools on the array, paint the isolators shut or walk across the solar panels. The ones that get in the most trouble don’t mask the panels off with drop sheets. Once they’ve covered the glass with paint overspray, it’s time to call your insurance company because no amount of cleaning will help.
If you get the paint off, it will likely damage the anti-reflective coating on the glass, and the trauma involved with scrubbing & pressure washing will have either caused invisible micro-cracks or injected water into the edges of the panels causing earth leakage issues.
Tiles Aren’t All Bad
They’re quiet when it’s raining, I suppose. Most electricians will tell you they’re easy to access and run new cables at least, so that can save time and money when you need a new induction stove circuit. And, of course, thieves love getting into a house without breaking windows too.
Original Source: https://www.solarquotes.com.au/blog/installing-solar-tiled-roof/
Related Posts:
 Why Solar Installers Hate Tiled Roofs
- Natural Causes: Solar Panels The Scapegoat For A…
- Can You Install Solar Panels on Tile Roofs?
- Renu Energy Brings Tesla Solar Roof Installations to…
- Do I Need a New Roof to Go Solar?
- From Sarking to Insulation: Hidden Solar…
- Installing Solar Panels with Raked Ceilings:…
- Should You Get Solar Tiles Instead Of Solar Panels?


